Friday, March 30, 2012

Banana-Coconut Pancakes with Blueberry Smash (& let's talk about GLUTEN)


(Gluten-Free)
Coconut-Banana Pancakes
& Blueberry Smash


These banana-coconut pancakes are out of this WORLD yummy, and super quick & easy! Not to mention, way better tasting and way better FOR YOU than some crappy pre-made pancake mixture with a bunch of who-knows-what on the ingredient list! I have been making them a couple times a week and perfecting the recipe. First, let's get down to business with making these delicious pannycakes...and then we have to talk about something. GLUTEN.


Blueberry Smash:
(High in antioxidants and a MUCH better choice than syrup)

1/3 c frozen or fresh organic blueberries
Coconut Oil (1 tsp)

Throw blueberries and coconut oil into a small saucepan. Turn on medium heat and let this go while you're cooking the pancakes. When the blueberries are hot and juicy, smash 'em with a fork turn the heat to simmer.

Banana-Coconut Pancakes:

NOTE: To my friends & loved ones who are allergic to coconut, NO WORRIES, I got you: OMIT the coconut shreds (throw in some walnut pieces instead!?!) and use another gluten free flour instead of coconut. Or just use regular flour.

1 large ripe banana
2 organic eggs
1.5 tbsp coconut flour (find this online, at your local health store or at a Whole-Foods type grocery store)
1.5 tbsp shredded (unsweetened) coconut
Cinnamon (large pinch)
Sea Salt (small pinch)
1/2 tbsp Coconut Oil
Organic brown sugar (optional)

Smash banana and whisk all ingredients together until the chunks are relatively small and everything is well-incorporated. Let sit for a few minutes (2-5) so that the batter thickens.

Heat coconut oil in a large pan/griddle or skillet. Pour 4 equal portions of the batter into the pan. Cook for about 4 minutes (med-heat) on each side, or until golden brown. I like to sprinkle a wee-bit (like a teaspoon total) on the pancakes before I flip them. Then I sprinkle some other the other side and flip them for just a few seconds at the end to caramelize the sugar. This makes for a bit of sweetness and a crispy outside of your pancakes!

(After about a minute in the pan before the first flip and after a bit of brown sugar...blueberry smash is a-steamin'!)


Serve pancakes with smash on top (you can use any kind of fruit - strawberries, blackberries, peaches, etc.) and serve with an egg for some more protein!

NUTRITION FACTS COMPARISON vs. BOXED PANCAKES

FYI, here are the nutritional facts for both my version and a traditional pre-mix store bought version with syrup:

Banana-Coconut Pancakes + Blueberry Smash
(2 pancakes + 1/4c topping)
181 calories
8 g fat
24 g carbs
5 g protein
Pancake Ingredients: BANANA, EGGS, COCONUT FLOUR, COCONUT SHREDS (UNSWEETENED), CINNAMON, COCONUT OIL, BROWN SUGAR
Topping Ingredients: BLUEBERRIES

Bisquick Pancakes + Aunt Jemima Original Syrup
(2 pancakes + 1/4c topping)
370 calories
2 g fat
83 g carbs
5 g protein
Syrup Ingredients: CORN SYRUP, HIGH FRUCTOSE CORN SYRUP, WATER, CELLULOSE GUM, CARAMEL COLOR, SALT, SODIUM BENZOATE AND SORBIC ACID (PRESERVATIVES), ARTIFICIAL AND NATURAL FLAVORS, SODIUM HEXAMETAPHOSPHATE.
Pancake Ingredients: ENRICHED BLEACHED FLOUR (BLEACHED WHEAT FLOUR, NIACIN, REDUCED IRON, THIAMIN MONONITRATE, RIBOFLAVIN, FOLIC ACID), SUGAR, LEAVENING (SODIUM BICARBONATE, SODIUM ALUMINUM PHOSPHATE, MONOCALCIUM PHOSPHATE), DEXTROSE, NONFAT DRY MILK, PARTIALLY HYDROGENATED SOYBEAN OIL, SALT, WHEAT GLUTEN, CALCIUM CARBONATE, DEFATTED SOY FLOUR, CORN SYRUP SOLIDS, SOY LECITHIN, SODIUM CASEINATE, MONO AND DIGLYCERIDES, SOYBEAN OIL, LACTIC ACID.
Nice. My rule of thumb? ALWAYS choose the product with less ingredients.


Buzzword: Gluten

NOTE: I don't have celiac disease or much of a gluten sensitivity...I just think we, as Americans, eat too much wheat in general. I limit any bread/pasta/etc. to 2x a week.

What is"gluten free"? Many people seem confused by this, which is why food manufacturers now proudly stamp "gluten free" all over their products (many of which NEVER CONTAINED Gluten in the first place). Gluten is a protein naturally found in wheat. It's a safe bet to say that anything that contains wheat, contains gluten. This includes: bread, pasta, cookies, crackers, flour, anything that is made with flour. Read more here. Bottom line - products like apple sauce never had wheat in it to begin with, but is now labeled "Gluten Free". I encourage ALL people to understand what gluten is, whether or not they want or need to avoid it, and not to become DEPENDENT on labels!

Consider this: How do you make PASTE in kindergarten? You mix flour together with water. It makes a thick, pasty GUNK. Now, imagine all of the bread, flour, wheat, dough, etc. that you eat, gunking up your intestines and digestive tract. Your small intestines are not smooth; they have textured walls. Over time, when you eat too much flour, you're filling in these crevices of these walls with "paste". This makes it tough for your body to absorb the proper nutrients. Think: smearing putty on a stucco wall....


Traditional Medical Doctors (MD's) test for gluten sensitivity via an invasive BIOPSY of your small intestines. *No thanks!* But, there are non-invasive tests that can provide a good indicator if one is gluten sensitive before resorting to an invasive test. A good first step would be to call a few (licensed) Naturopathic Medical Doctors in your area. Each state should have an association. For example, here is Michigan's (MANP). Many times they can get an indication of gluten-sensitivity via a simple stool test. An easy way to find out on your own is to just remove all gluten-containing products from your diet. Wait a MINIMUM of two weeks (better 4-6 weeks) and then see if your symptoms clear at all. Eat a big plate of whole wheat pasta. Then see how you feel...

Siting my sources: my#1 nutrition source comes from expert Dr. Matthew Marturano, NMD.

While you're checking out his site, make sure to take a look at our new business to teach other Metro-Detroiters how to eat REAL whole food and live healthier: Green Dreams!

Saturday, February 25, 2012

Rosemary-Parmesan Focaccia

Today I had a couple hours to kill and a bunch of fresh rosemary sitting in the fridge. In lazy Saturday style...I found a couple of recipes and tweaked/combined...voila!

Ingredients

  • 1 cup water
  • 3 tablespoons olive oil
  • 1 1/2 teaspoons white sugar
  • 1 1/2 teaspoons salt
  • 1/4 teaspoon ground black pepper
  • 1 tablespoon fresh rosemary
  • 2 tablespoons grated Parmesan
  • 2 1/2 cups bread flour (I used all-purpose and it turned out just fine!)
  • 1 1/2 teaspoons active dry yeast

Directions

1. Mix yeast with 1/4 c of warm water, wait 10 min.

2. Add flour, salt, sugar, oil and rest of the water...kneed it good.

3. Add the rosemary, cheese & pepper and knead some more; add handfuls of flour one by one if needed.

4. Let rise an hour or so in an oiled, covered bowl in a warm place (I usually look for a heat vent and top the bowl with a clean kitchen towel).

5. Kneed some more, let rise another hour.

6. Bake at 375 until browned (25 min or so)

7. Remove from oven, brush with olive oil and sprinkle with coarse salt.


Tuesday, January 17, 2012

Seared Swordfish Steaks, Blue Cheese Smashed Taters & Kale...with a Lemon Butter Sauce


Tonight's dinner was pretty freaking delicious (according to me...and Matt...and the cats). I found some Sashimi Grade, Wild-Caught Swordfish steaks at Trader Joe's last week...only $7.29 a pound, which is a GREAT deal...so here goes:


PAN SEARED SWORDFISH STEAKS

Ingredients:

1 lb swordfish
Sea salt and freshly ground pepper
Vegetable oil (NOT olive)

Directions:

Preheat the oven to 450. Heat a frying pan to medium-high heat. Pat the fish down and salt & pepper it liberally and rub in a bit. Put some oil in the pan and get it pretty hot. Sear the swordfish steaks 5 min per side. Place in a shallow baking dish and finish for 5-8 minutes in the oven.

LEMON-BUTTER SAUCE

Ingredients:

1/2 stick butter
Juice of 2 lemons
Zest of 1/2 - 1 lemon (I used one, it was pretty zingy!)
Sea salt & pepper
Pinch of garlic powder (or use fresh minced)

Directions:

In the saucepan, add the lemon juice, lemon zest and butter. Add a pinch of salt, pinch of garlic powder and butter. This will combine, heat and increase in deliciousness while you're cooking.

BLUE CHEESE SMASHED POTATOES
(Overheard a lady at yoga class saying her husband was making blue cheese potatoes for her birthday dinner. HAD to try!)

Ingredients:

3/4 lb Yukon Gold (or Idaho) potatoes
2 oz blue cheese
1 tbsp butter
Splash of milk
Cracked peppercorns

Directions:

Boil potatoes in salted water until soft. Drain. In a large bowl, toss potatoes with the blue cheese, butter, milk and freshly ground black pepper. Smash with a potato smasher or fork. Taste and add salt if needed, but the blue cheese is pretty salty!


KALE

Heat salted water to medium-high and add kale. Cook until soft and bright green. Drain.


Plate and top the whole thing with the lemon butter sauce...let me know how ya like ;)

Saturday, January 14, 2012

Cheesy Gallo Pinto Stuffed Peppers {Vegetarian}

Gallo Pinto is a Costa Rican staple translating directly as "Spotted Rooster". It's basically a spiced up version of black beans & rice. I make a big batch of this every week or two and it can be easily reheated as a side dish or mixed with greens as a salad option for the rest of the week!

For a hearty vegetarian entree, I've stuffed it into organic red bell peppers along with some grated cheddar cheese.

Gallo Pinto

Ingredients:

2c cooked white or brown rice (1 cup dry)
1.5 c cooked black beans (or use a 15oz can)
1 medium yellow onion (diced)
1/2 red, orange or yellow bell pepper (diced)
2 cloves garlic (minced)
1 handful cilantro optional
1 tsp cumin
1 tsp turmeric (optional)
1/2 tsp paprika
1/2 tsp chili powder
Sea Salt
Olive Oil

Directions:
In a large sautee pan, heat about a tablespoon of olive oil and sautee onion, bell pepper and garlic. Add cooked beans and rice. Add spices and sea salt to taste and lastly, chopped cilantro. Sautee for a minute or two, until combined and hot.

Sometimes I add carrots (here) and/or jalapenos for added flavor & nutrition


Cheesy Pinto Gallo Stuffed Peppers (makes 2)

Ingredients:

2 large bell peppers of your choice
2 cups gallo pinto
1 large handful (about 1 oz) grated cheddar cheese and a little more for topping
Olive oil

Directions:

Preheat oven to 350 degrees. Prepare peppers by cutting the tops off and gutting them. In a mixing bowl, mix cheese with gallo pinto. Stuff each pepper and add a bit more cheese on top. Replace tops of peppers. Pour a tiny bit of olive oil onto your hands and rub on the outsides of the peppers (and the stems...this helps prevent burning). Bake for 30-35 minutes, until peppers are soft. When I'm only making 2 or 3, they fit really nicely into a loaf pan and aren't able to tip over and spill!

Super yummy and about 250 calories per stuffed pepper!

Wednesday, January 11, 2012

Travel and FOOD in Guatemala: Stay Tuned!

My homemade guacamole & handmade tortilla chips in Puerto Viejo, Costa Rica (2010)
~Flower compliments of the rainforest!~

Rainforest, Pyramids, Ruins, Caves, Beaches, Coffee....and TROPICAL FOOD here I come! Continuing our Central and South American tour, this time we're headed to Guatemala! I'm planning to explore (hands-on) local Guatemalan cuisine via this blog, but it only makes sense to preface the food aspect with how we're fully able to experience it. I have been asked how in the WORLD we're able to get away for so long. There are many components of traveling to exotic places for SUPER cheap:

1) Choose your destination wisely! We like to evaluate potential destinations first and foremost by cost of plane ticket in and prices while we're there. For example, flying to and staying in South and Central America costs a FRACTION of what a European trip would.

2) Staying in hostels or bartering on a weekly house rental is at the very least HALF and as little as 10% of the cost of a hotel or resort.


We were able to stay in this house in Costa Rica for $65 a night. PARADISE!


3) Eat with the locals and skip the "Americanized" joints (you didn't travel all this way to eat a burger and fries, did you??!) We like to check out eateries that are rich in local culture and food, and easier on the wallet. Explore the kinds of restaurants where the owner IS the chef!
$1.50 USD in the mountains of Peru
(a STEAL if you're OK with chickens and cats hanging out inside the joint!)


4) Cooking local food! See #2: we pick places to stay that have a kitchen available at our disposal. Not only does this save money, but I really enjoy cooking with fresh, local ingredients and replicating dishes I've found in local restaurants. Shopping at the local markets and getting a fish straight from the water is the best and most flavorful way to go!

Market in Cuzco, Peru (2009)

5) Utilizing local transportation: take local buses both for cost-saving and entertainment value instead of touristy "luxury vans" and coach services.

6) Pack light and skip the extra baggage fees and lugging around heavy stuff. Do NOT to go to a 3rd world country with your wardrobe of designer shoes and clothes and jewelry, unless you want to stand out like a sore thumb and potentially be the victim of theft. Worried about bringing enough clothes? There are always laundry facilities that you can access and of course, anything that you "forget" can easily be acquired. People do live, eat and wear clothing there every day... The goal is to blend in and assimilate as much as possible, so pack for comfort. Last year I went to Costa Rica for 3 weeks with one backpack and one messenger bag...it can be done.

7) (Oh yeah...FLY FOR FREE!) This year, we paid our taxes and purchased most all food/general items on our Spirit card and earned a ton of miles so that this flight was absolutely FREE! Just make sure to pay your balance off each month! ;)

8) Leave the fear at home! An all-inclusive resort vacation or cruise is definitely "easier" and "safer", but if you ask me, there is no REAL reward in travel without some risk and uncertainty. Taking note of all of the other travelers, business people and kids in your foreign destination helps to put "travel warnings" into perspective. I mean, I have to remind myself that I DO live in Detroit for most of the year. ;) Of course, always use common sense and general awareness to make sure you're not in the wrong place at the wrong time.

Stay tuned....next post will be about my travel "equipment". ;)

Sorry, one more: beef tacos and veggie salad in Puerto Viejo, Costa Rica (2010)


Sunday, January 8, 2012

Roasted Butternut Squash Soup


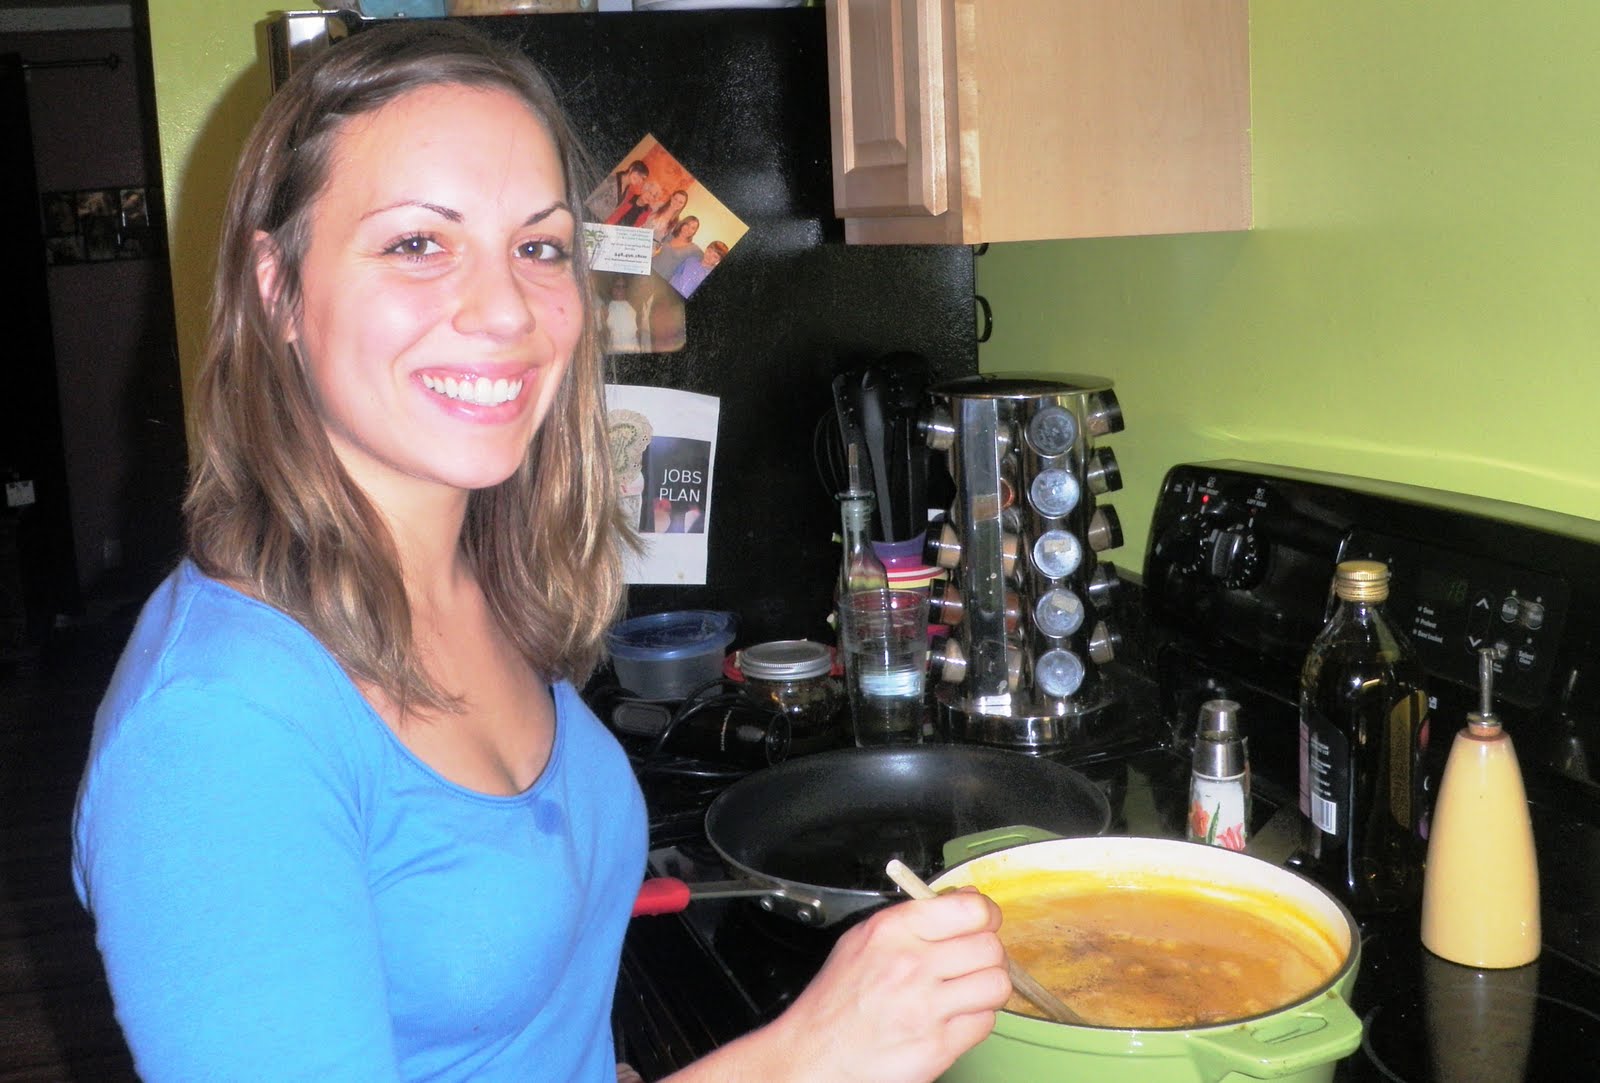
Happy New Year! In 2011 - as soon as I bought the immersion blender last February - I started experimenting with blended veggie soups. They're hearty, pretty easy to make (if you have a couple hours) and a delicious way to get your veggies in. I've made squash, asparagus, sweet potato, jerusalem artichoke, celery root etc. My friends Lindsey and Liz came over for dinner in December and raved about the butternut squash soup I'd made with dinner. Today, Lindsey came over to make some with me and learn how-to. So much fun! :)
Lindsey picked out some nice squash!

Here's my #1 soup tip: use the SAME base, every single time for fool-proof veggie soup broth: mirepoix (about equal amounts of carrots, onions and celery)+ garlic + salt. Cover it with 6-8 cups of water. After it cooks down for almost an hour, then add whatever vegetable(s) you choose and experiment with other herbs, spices and fats. Either blend or leave chunky.

Prep time: 20 min, Total time: approx 1.5 - 2 hours
Makes: 8+ servings

Roasted Butternut Squash Soup
Ingredients:

1 large butternut squash (3.5 - 4 lbs) halved and "guts" scooped out
1 medium yellow onion (diced)
3 medium stalks celery (diced)
3 medium sized carrots (diced)
2 cloves garlic (sliced or minced)
2 oz Organic Half-and-half or heavy cream (Optional)
Olive oil
Sea Salt
Pepper
Cumin
Nutmeg
Turmeric (Optional, but adds great color and is a wonderful anti-oxident)


Equipment:

Large cast-iron ceramic coated pot (or just a large spaghetti/soup pot)
Immersion blender or regular blender

Directions:

Preheat oven to 375. Prep all veggies. Heat your big pot to medium-high and add a tablespoon of olive oil.

Once the oil is hot, throw your mirepoix in and let it go, stirring occasionally, for several minutes. Once the veggies start steaming and smelling super fragrant and soft, add 1 tbsp sea salt, approx 1 tsp pepper, 1 tsp cumin and 1 tsp (optional) turmeric. Sautee for another 30 seconds or so while stirring. (We'll add the nutmeg in at the end.)

Mirepoix: the fancy french term for equal parts of carrots, celery and onion

Cover the veggies with about 4 times their volume in water. Turn to high and once it comes up to a boil, turn the heat down and let simmer.

Roast your squash for about 35 minutes, until you can easily stick a fork through the skin. Let cool about 20 min.

Scoop the squash out of the skin and add to the simmering soup base. Let cook together 15 minutes or so.

In goes the squash! The pretty yellow color at this point comes from turmeric.

With your blender or immersion blender (aka best $50 I've spent) and blend until smooth.

Linds giving the immersion blender a whirl

Add 1-2 tsp nutmeg (according to your preference) and add the cream. If you DON'T add cream, I suggest adding a bit of fat (a healthy cold-pressed oil like olive, coconut, grape seed, avocado or some organic butter) to balance out the flavor. Stir and turn heat off.

A spill on my shirt. Typical.

Serve hot. I served with a plate of super foods! We had: wild caught pink salmon, sauteed garlicky kale with lemon and smashed "creamsicle" (white and sweet mixed) potatoes. Delicious and probably one of the most balanced, nutritious plates you could ask for:


Highly anti-inflammatory and off the charts in vitamin A, C, K and B6. IT's a great source of protein, omega-3, calcium, selenium, potassium, magnesium, maganese, copper, etc. This meal is pretty much SMACK dab in the middle of balanced (fat, protein, carb) and very rich in vitamins and minerals.

I generally make a big pot of soup like this once a week on Sunday...that way we can enjoy it for lunch during the week. Pick a favorite veggie and try it!

Monday, December 12, 2011

A Rainbow of Hummus!


If you're like me, a Detroiter with a love of whole, delicious and flavorful food, you probably love hummus. It's one of my favorites to make. Simple ingredients, quick to make and nutritious. I do get bored with the traditional chickpea hummus, though. Over the past few years I've experimented with several varieties that share the same flavor and consistency profile of hummus, with a twist. Here are a few new favorites of mine:

Sweet Potato Hummus

{Makes 4 large (1/4 c) servings}

Ingredients:

3 medium sweet potatoes (around 1 lb)
1 large garlic clove
3 tbsp tahini paste (purchase at an ethnic store for the best price!)
1 tbsp olive oil
1/2 tsp salt
1/2 tsp cumin
1/2 tsp paprika
1/2 tsp red pepper flakes (optional)

Directions:

Boil halved sweet potatoes in their skins until tender (approx 30 min or until you can stick a fork through) and then toss them directly into an ice-bath for a couple of minutes. The skins should easily peel off. Let cool. In a food process, blend potatoes with cumin, salt, paprika and red pepper. Slowly pour in tahini and olive oil. The ideal consistency is thick and creamy. Add a tiny bit of water if it is too thick. Spoon onto a plate or bowl and drizzle a few drops of olive oil and dashes of paprika. This variety has a beautiful orange color and naturally sweet with a delicious warmth from the cumin. Great with homemade pita chips or carrots.

Nutrition data:

183 calories
4 g protein
9 g fat
23 g carbohydrates

Personally, I find that understanding the nutrition behind food makes creating healthy balanced (rainbow-colored) meals more fun! This dip is very rich in bet
a-carotene which your body uses to produce Vitamin A. Vitamin A helps your eyes adjust to light changes when you come in from outside and also helps keep your eyes, skin and mucous membranes moist. Vitamin A mostly comes from animal foods, but some plant-based foods (like sweet potatoes) supply beta-carotene, which your body then converts into Vitamin A. It also has antioxidant properties that neutralize free radicals in the body that cause tissue and cellular damage.

Edamame Hummus


Ingredients:

12 oz package frozen shelled edamame (found mine at Trader Joes)
1 large garlic clove
3 tbsp tahini paste (purchase at an ethnic store for the best price!)
2 tbsp chopped fresh parsley (optional)
1 tbsp olive oil
1/2 lemon, juiced
1/2 tsp salt
1/2 tsp cumin
1/2 tsp paprika

Directions:

Either boil edemame in shells and toss them directly into an ice-bath for a couple of minutes and then peel, or boil pre-shelled frozen edemame according to package directions. Let cool. In a food process, blend edemame with garlic, cumin, salt, paprika and lemon juice. Slowly pour in tahini and olive oil. The ideal consistency is thick and creamy. Continue to add tablespoons of water until the consistency is what you're looking for. Spoon onto a plate or bowl and drizzle a few drops of olive oil and dashes of paprika. This one is mild, high in protein and beautifully GREEN!

Nutrition data:

202 calories
11 g protein
14 g fat
12 g carbohydrates


Spicy Black Bean Hummus


Ingredients:

12 oz black beans soaked overnight and boiled (or use a can)
1 large garlic clove
Handful chopped fresh cilantro
1/2 habanero or 1 jalapeno (optional)
3 tbsp tahini paste (purchase at an ethnic store for the best price!)
1 tbsp olive oil
1/2 lemon, juiced
1/2 tsp salt
1/2 tsp cumin
1/2 tsp chili powder

Directions:

Either boil black beans and let cool (or be lazy like me and use a can). In a food process, blend black beans with garlic, cumin, salt, paprika, chili powder, jalapeno and lemon juice. Slowly pour in tahini and olive oil and add chopped cilantro last. The ideal consistency is thick and creamy. Add tablespoons of water until it gets to a creamy consistency. Spoon onto a plate or bowl and drizzle a few drops of olive oil and dashes of paprika. This is especially good on homemade tortilla chips or an assortment of colorful pepper slices.
Ole!

Nutrition data:

239 calories
11 g protein
10 g fat
28 g carbohydrates


Homemade Whole Wheat Pita Chips

Making pita chips at home is super easy, and cheap! At your grocery store, an 8 oz bag of chips will run around $4. I buy bags of pita at a local middle eastern market for $1.69/lb. This means I save >75%, and can add whatever seasonings I like. WIN!

Ingredients:


1 Pack of pita (generally 8-10 loaves).
Olive oil (to drizzle)
Salt


Preheat the oven to 350. Cut pita into half and then into triangles. Arrange in a single layer on two cookie sheets. Drizzle with olive oil, sea salt and rub the pitas with your fingers to coat. You can add other seasonings like sumac , cheese or whatever you'd like. Bake for about 8-10 minutes, rotating the pan and flipping pieces halfway through. So versatile and not deep fried like a lot of pita chips at the store. :)